

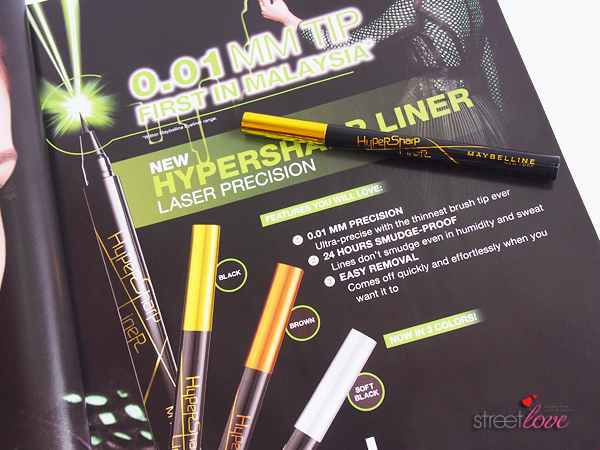
It is seriously eyeliner olympic season now girls. With so many brands releasing numerous types of eyeliner product into the market recently, one particular eyeliner pen stood out the most among the rest. It is none other than the NEW Maybelline HyperSharp Liner Laser Precision.
I am a.b.s.o.l.u.t.e.l.y obsessed with winged eyeliner-do. It’s funny I said that because one year ago, I know nuts about eyeliner what more drawing one! Let’s face it. I have a typical Asian Chinese eye shape that is probably not the easiest shape to draw onto. The biggest mistake I made is that I never study my eye shape before getting on the eyeliner bandwagon. So I practise and practise and practise. I have tried almost all the method there is to get the perfect winged eyeliner. I was fine with one particular way of eyelining until a good friend of mine told me the winged is a little bit droopy. Droopy? What droopy? That’s the shape XiaXue and Cheeserland had! 😀 . You’re in luck today because today I’m not only going to introduce you to the new liquid eyeliner from Maybelline but I’m also going to share with you one easy method to do winged eyeliner, which I just learnt and mastered haha!
There is so many types of eyeliner products to choose from. My favourite would be liquid eyeliner because (1) it’s easy to use, (2) it’s easy to control, (3) it’s faster and (4) it last the whole day on me. However not every liquid eyeliner suits me because my eyes tears up when I laugh, when I smile too hard and when there’s no reason at all LOL. That is because I have very sensitive eyes. In conclusion, I need liquid eyeliner that doesn’t melt when in contact with water. If you’ve been following me on Instagram you would know that I was on the search for the perfect liquid eyeliner. Maybelline HyperSharp Liner Laser Precision would be the perfect choice for me. Why so? It is 24 hour smudge proof and it doesn’t smudge even with humidity and sweat.
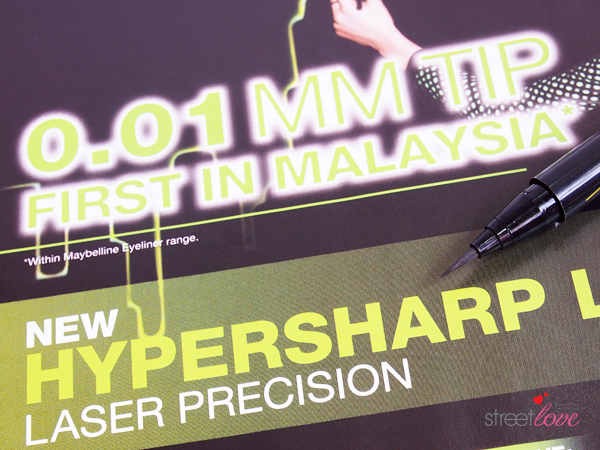
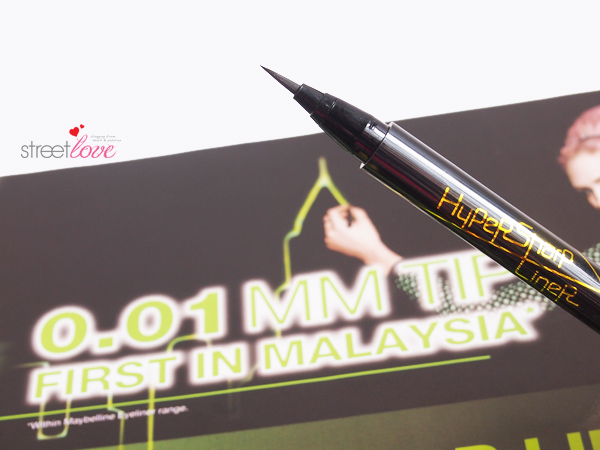
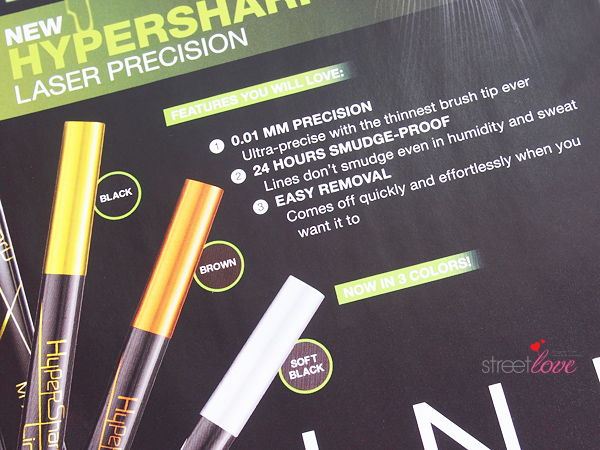
The most important note for winged eyeliner is to get the finest tip at the end of the wing. This is why Maybelline HyperSharp Liner Laser Precision is the best candidate for the job. This eyeliner has the highest laser sharp precision ever at 0.01mm tip that allows ultra-precise design. I remember the old HyperSharp Liner is not quite opaque and it’s a little bit too watery for my liking. This new HyperSharp Liner Laser Precision solved all that and even the fine tip at the end of the wing is pigmented.
I’m not going to do a swatch on the back of my hand because I felt it’s not necessary since I’m doing a winged eyeliner tutorial anyway 😀 . Before I start, I have to stress again that I am no makeup guru. This method is how I like to do my winged eyeliner and I thought of sharing out to help those that are facing the same problem as I do. That’s all. Aight? 🙂
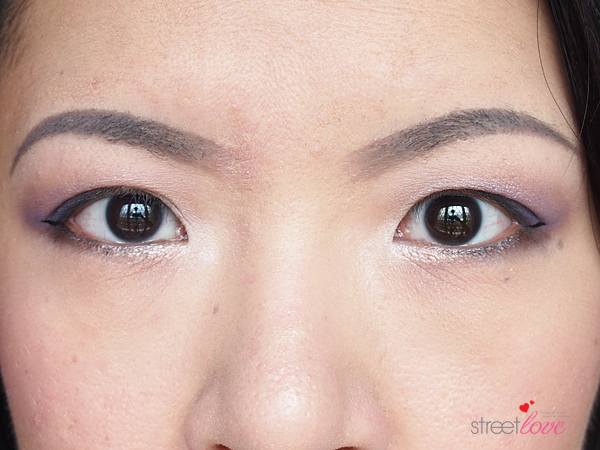
My typical Asian Chinese eye shape – droopy eyelid, small and tight crease, double eye lid crease started from inner eye corner which resulted with crease line ending far back on the outer corner eye and I have round crease. Both my eye shape is different. Left eye is rounder while right eye is narrower and longer. Crease opening is also different for both eyes.
Step #1 – Create a winged flick
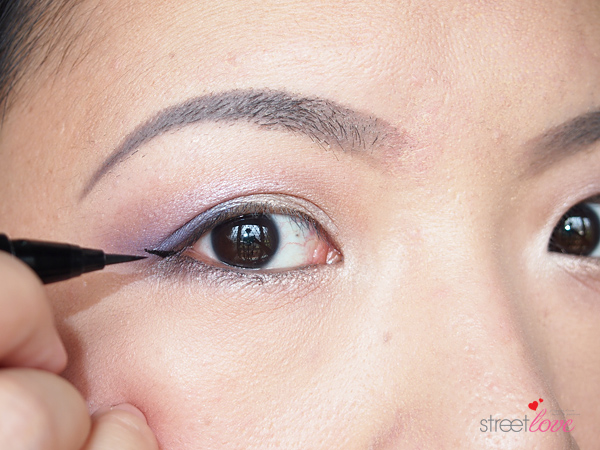
The issue I had with my eye shape that makes winged eyeliner so difficult is that the crease line ending is far too long to the back and the space between the crease is round. Rounder crease means it’s hard to get a straight line. If I lift my eye brow to draw the flick, the flick would be flat thereafter. The best solution for me is to draw a flick with my eyes opened, looking straight into the mirror.
First, sit further away from the mirror and look straight into the mirror. With eyes open and without lifting your eyebrow, draw a flick from the corner of your eye. Pretend that you’re joining the line from your eyes. Start with a small flick and build later on.
Repeat for the other eye and compare both eyes if you have the same shape. If not, use a makeup remover and try again. Always remember that eyeliners are sisters, not twins. You don’t need to get the exact identical shape.
Step #2: Draw a line along the upper lash line
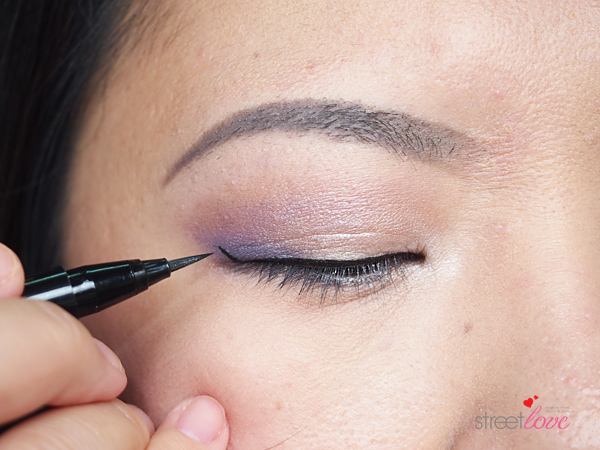
Once you are satisfied with the flick marking that you’ve done earlier, it’s time to join the line. Draw a line close to the upper lash line, starting from the inner corner of the eyes. If you are new to this, you can do small dash and join these dashes to form a line. Otherwise you can draw half eye first, stop and continue the other half. Don’t worry if you can’t get close to the lash line. You can always fill in the gap later on.
Here’s a tip for shaky hands. Place your pinky finger on the face as a support. This way your hand will not be as shaky as before and it’s much more easier to draw the line this way. Connect the line to the flick.
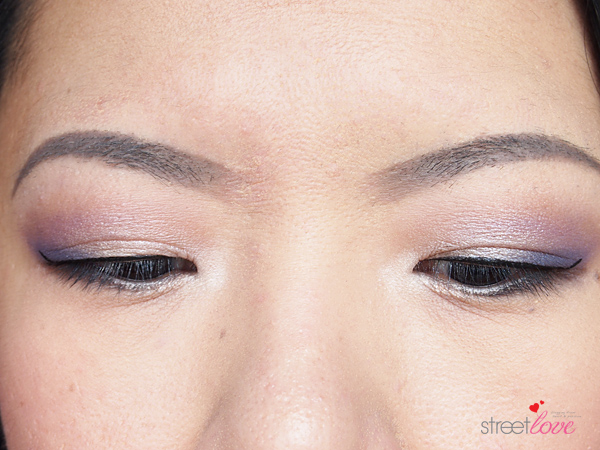
This is how it should look like after you’re done with both eyes.
Step #3: Add a line on the flick mark earlier, making a triangle shape
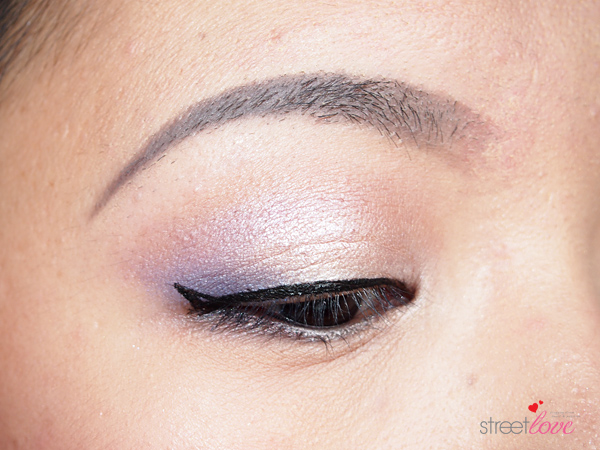
There’s 2-ways for this step. For newbie, draw a line on top between the flick and the lash line forming a triangle shape. The other way is to place the tip of the eyeliner pen on the tip of the flick and drag the line over to the 1/4 of the lash line.
Step #4 – Fill in the gap
This is the easiest step of all. Just fill in all the gaps i.e. the flick, upper lash line, lash line and upper water line. Once you are done with that, you should also carefully winged out further. Not a fan of longer winged eyeliner? No worries. Just draw on a finer tip to the winged eyeliner as the original shape was too thick.
TIP: Under eye clean-up
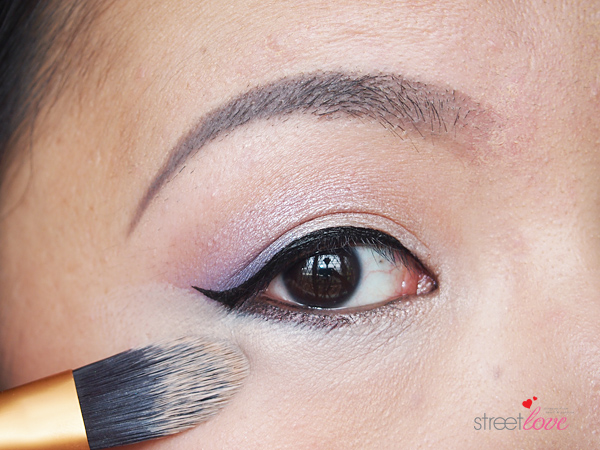
Here’s a little tip from me. This is optional but it is something that I like to do after I’m done with eyeliner. Most people don’t do this step on day to day basis or rather not knowing about it. That is cleaning up the under eye. Regardless if I have eyeshadow fall out or not, I personally like to clean-up my under eye. The trick here is to use a concealer that is suitable to be used on top of powder. That is because I do my eye makeup AFTER the base. If you do the opposite, any concealer will do. This step will require a concealer brush for precise clean-up. Concealer should be applied on the under eye up until the side of your eyes/temple. Use a concealer brush to smooth the product away and to get close to the lower lash line, just like the picture above. Set the concealer with finishing powder once again.
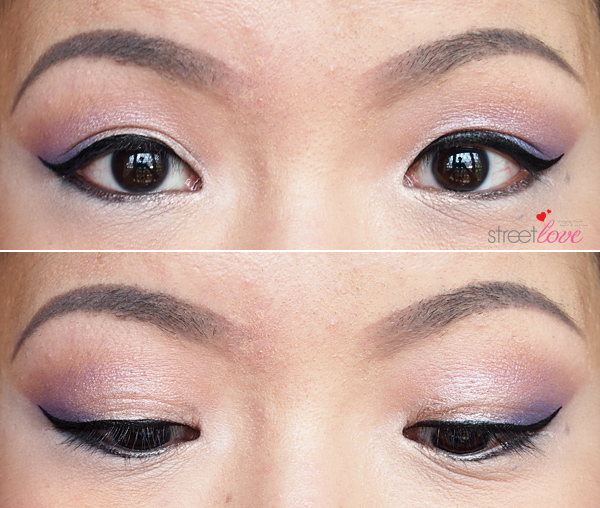
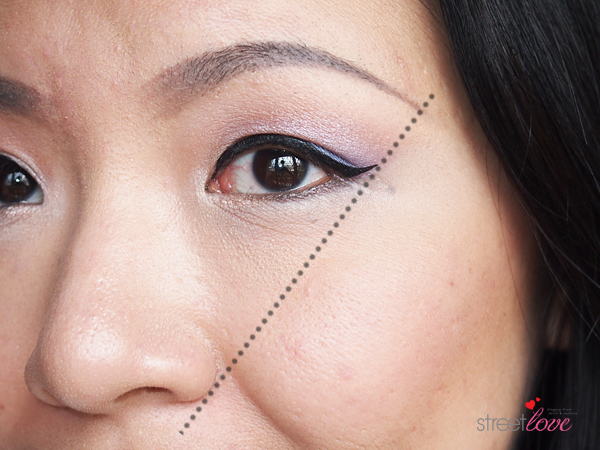
Here is why cleaning up the under eye is so important. Due to my odd eye shape, I have to lift my eyebrow up so that the eyeliner is visible. Sorry about that. Just look at how precise the eye makeup is after the clean-up. Oh and do ignore my left eye brow. It’s shorter than it should be LOL. The concealer also brighten up under eye area.
TIP: Precise alignment
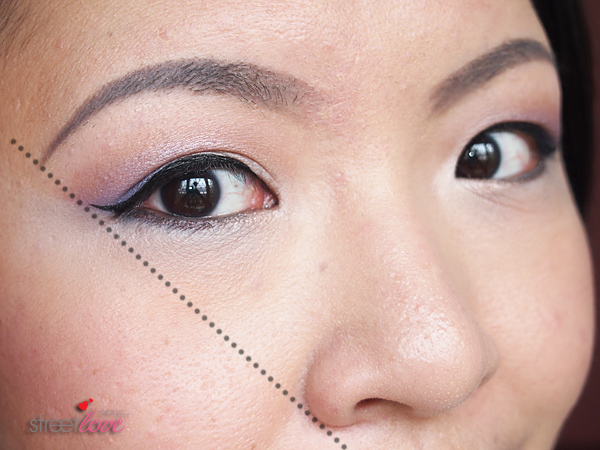
As I explained before in my How To Draw A Perfect Eyebrow tutorial, you have to align the ending of your eyebrow to the side of your nose like the diagram above and below. The tip of your winged eyeliner should also end in alignment with it.
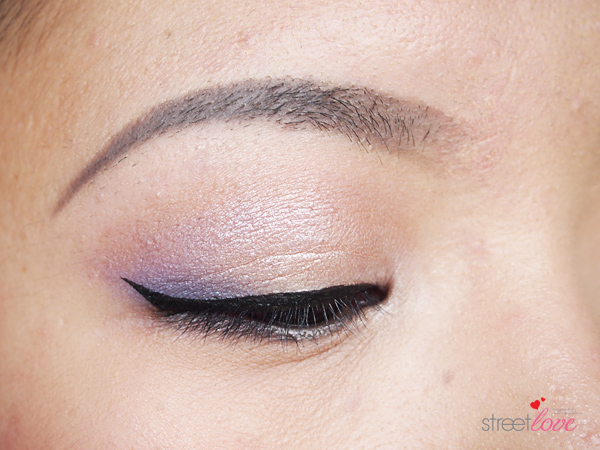
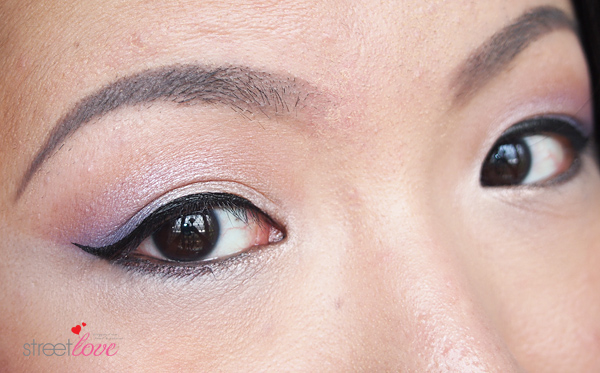
Here’s the end result with using Maybelline HyperSharp Liner Laser Precision in Intense Black. I had this eyeliner out in the hot sun recently and to an event. Usually the flick of my winged eyeliner will be melted away whenever I’m talking to someone because like I said earlier, my eyes tears up easily. I was tearing at this event. One of the activities of the event is “eye reading”. It’s something like face reading. So of course I need to check if I look like a panda before meeting the master. To my horror when I check…everything was still intact! Nothing was melted off and there’s no smudges even after all the tearing. My eye makeup basically still looks the same as when I step out of the house. The finishing for Intense Black is quite natural without the fake shine or harsh line. It also dries up fast therefore no transfer on the eyelid when I blink during application. Not bad eh? 😀
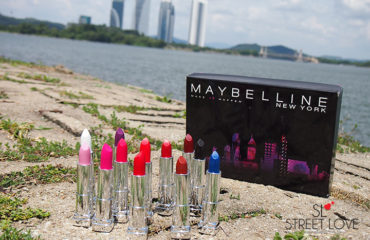
Maybelline HyperSharp Liner Laser Precision comes in three shades – Intense Black, Brown and Soft Black. My favourite? Intense Black all the way 😀
I would say the second main feature is the formula. It’s what makes the ultra-precise 0.01mm tip easy to apply. The formula is not too watery, just perfect for application. But if you do leave the cap off for say maybe two minutes or more, the brush will dry out a bit. Run the tip over the back of your hand and it will be back to normal again.
Lastly, removal. The most misconception about waterproof makeup products is that it is hard to be removed. Some product yes, some will came off with just warm water and some will need remover product. This one came off without any tugging or rubbing. It’s a breeze to get it off, really. My all-time favourite eye makeup removal has got to be bi-phase remover. Easy peasy 😀
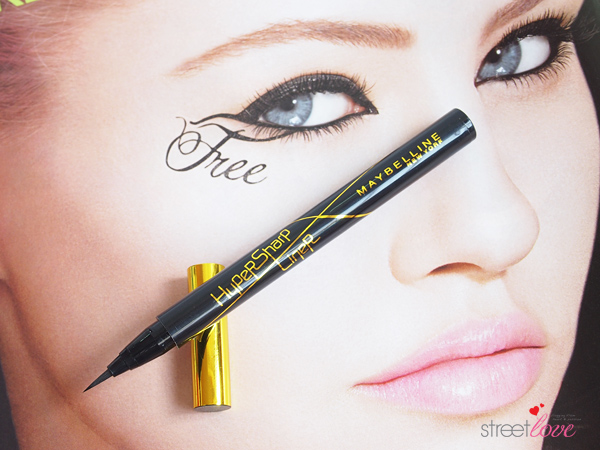
Maybelline HyperSharp Liner Laser Precision comes in Intense Black, Soft Black and Brown. It is available at all leading pharmacies and department stores nationwide.
Price: RM35.90
Visit Maybelline Malaysia Facebook page for more exciting news, tips, makeup videos, promotions and many more at https://www.facebook.com/MaybellineMalaysia
Website: http://www.maybelline.com.my/
Disclaimer: Product was sent to me for review consideration. This doesn’t affect my judgement in the review in any way.
Comments (24)
Aaah, perfect eyeliner!! Gonna try this trick later today. 😀 Thanks for the tute, Fiona!
Hope it helps. Winged eyeliner is difficult to do but once you master the technique that suits your eye shape, it’s going to be a breeze 😀
Thanks for the tutorial, Fiona 😀
I’m hopeless with eye-liners – have used the gel type, pencil type, pen type, almost all…
And end up drawing one eye bigger than the other or smudging up my eye and face. 0_0″
And ALL of them melt when I’m halfway through the dinner and I end up looking like I’ve cried buckets of tears *HORRORS*
This will certainly be a good investment for me 😀
I hope the tutorial helped 😀
I like to do bigger, wider winged eyeliner but unfortunately my crease line is soooooo small and tight. Sigh.
Gel usually don’t smudge as compared to pen, pencil, kohl or liquid. This new Maybelline one doesn’t melt 🙂 . Usually mine melt off too haha
Was waiting for review since you posted the pictures in insta! I have yet to master winged eyeliner since I have droopy eyelids, gonna try the technique you taught 🙂 Hopefully it works for me.
Well now you have it! 🙂
I have droopy eyelid too. That’s why my most important technique has got to be Step #1…the flick. Just remember to do it with normal eyes opened, looking straight into the mirror and flick it.
I am so bookmarking this page! i love winged eyeliner but i only know how to do it using gel liners in pot with a brush or pencil liners. i never had any luck with thin felt tip eyeliners, it makes me sad coz my tangan kayu doesn’t know how to draw precisely with thin eyeliner tips.
It’s more or less the same concept with using gel liner in a pot 🙂 . I find felt tip works better when it comes to the thin flick at the end of the wing. I do admit it takes a lot of practise with pen type. Don’t worry. You’ll get it.
Wow thanks for the tutorial!! The eyeliner you draw is so perfect! I always has a problem with my 1 single and 1 double eyelid. 🙁 and eyelid sticker is not helping at all. I hope the other eye will become double eyelid very soon just like yours!
Glad you like the tutorial 😀 . I was born with one double eyelid (left eye). I remember the day before I went for my 18th birthday portrait shoot, the other eye suddenly have double eyelid. I keep praying it will last and it did till to date 😀 . Just the both eye’s crease is totally different lol
This post is so so so awesome! Love the photos, eye makeup and also write up. You are so skillful! I have no other words but amazed by the perfection of your eye makeup! The photos are so clear and sharp. Lol. I really love your eye makeup! Ok, now if you will excuse me while my eyes stay glued on the above photos 😀
Thanks dear. I’m still far away from skillful hehe. This is my usual eye-do nowadays. Takes a longer time too phew. Thanks for all your compliments 🙂 . Come out one day and I’ll hand over some tricks haha
Thank you very much or this tutorial Fiona. I really suck at doing winged eyeliner even with this Maybeline HyperSharp Eyeliner. I think I have the earlier version of it (I did know know there was a new version?) and still cannot draw a proper winged eyeliner. LOL.Will bookmark this page and practice, practice and practice. I like your tip on cleaning up the smudges, definitely a good practice to have 🙂
You’re welcome! 🙂 . Oh the new version was just launched not too long ago, probably 3 weeks ago? This method will work with any product i.e. pen, liquid, gel. I even tried it with Bourjois Intuitive Liner that comes with 3-felt tip haha. Under eye clean up makes a huge difference. You’ll not only have a brighter under eye, you look wide awake and fresh too. That’s what YouTubers is doing nowadays 🙂
Wow such a detailed review! I always have problem in drawing a winged eyeline since I have weird eye shape, maybe weirder than yours! Anyway I will try your method and see whether it works hehe!
Wider is alright 🙂 . The most important is how your crease ends. Sometimes when it end too far behind, the crease gap could be round and it’s hard to draw a straight line for the flick.
cool! finally found a similar eyeliner to empro. cheaper too! thanks!!
Yes, lots cheaper 😀
How come you can make it look so easy? haha! Since I never use liquid eyeliner before, I should have a try for this cause its 50% discount!
It’s really very easy only. My eyelids are so tricky also I can make it haha. I’m sure you can 🙂 . I’m back to this eyeliner for the past week. The blackest I can find 😀
Nice, the wing really suits you! I’m also impressed by your precision brow.
I have this exact Maybelline liner and it’s okay and precise but I find the brush doesn’t hold ink as well over time and the bristles flay a little more compared with my Japanese liners so it’s not as easy to get the sharp tip at the wing end when this happens.
I really love the Japanese pen liners and it’s hard to replace those but the Maybelline is cheaper when the Jap products are not on sale.
You could have the old version. There’s two type actually an both type has the same packaging. I agreed with the brush doesn’t hold ink over time for the older version. I had this new version eyeliner for nearly a year now and I sort of forgotten about it for the past 8 months because I had it in my stationary case lol. I took it out recently to use because my Marc Jacobs dried up after a few usage. To my surprise, it’s still in good condition 🙂 . Also didn’t have flay bristles issue. Hmmm.
Japanese pen liners are good indeed. I just didn’t like that it’s not as black as they claimed. And they melt when my eyes start to tear up 🙁 . I think once in a while Sasa would have sale 😀
I like the fact that it’s sharp therefore making my life easier when it comes to drawing catwing. However the only thing that bothers me is the fact that it dries out fast when i’m doing my eyeliner, so i find myself having to shake or hold the pen upside down for a minutes so the tip will be wet again. Kinda inconvinient it i need to be fast. The shape of the pen is just nice, it is not troublesome. One of the cheapest there is out there.
That’s a very good review Qis! Actually I never notice that it dries out fast until a few of my friends mentioned it to me. So I bought 2 new one (buy 1 free 1) and took one out to use. True enough. It does dries out fast. Especially the newest version, which is this one. Good thing is like you said it’s cheap and Guardian do have buy 1 free 1 all the time haha 😀
Lovely to see you here Qis <3