
This year I have not been utterly excited with any new or upcoming makeup except for the Smashbox Double Exposure Palette. Whenever I am at Sephora, I always stopped by Smashbox shelf to look and swatch the Full Exposure Palette. Now, this is something I don’t do as I’m not into neutral shade eyeshadow palette and somehow I was attracted to Full Exposure Palette as many YouTubers are raving for it. I was still pretty much in awe with it until Smashbox Malaysia telling me somewhere last year that there will be a new palette coming and that is the Double Exposure Palette. One of my favourite YouTuber Shaaanxo reviewed the palette and when I saw the shades on the palette, I was sold there and then. It is definitely not an all-neutral palette and there are a wider selection of light fleshy shades with purple and blue within the palette, which is right down my alley 😀
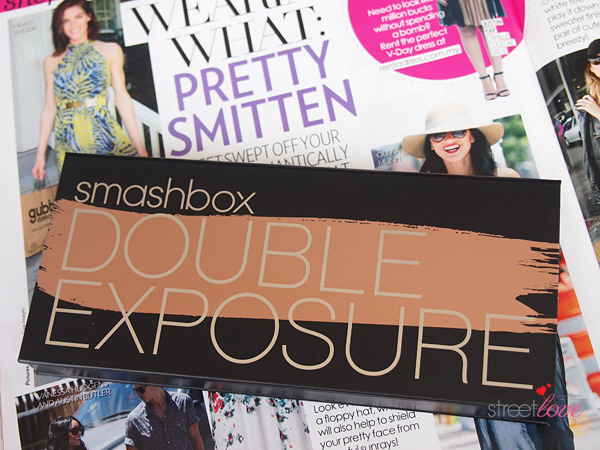
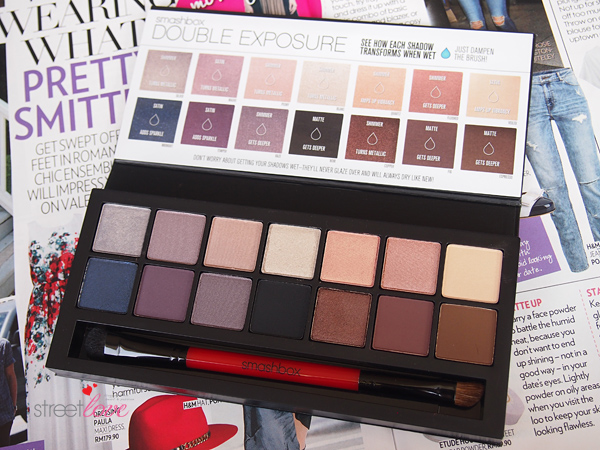
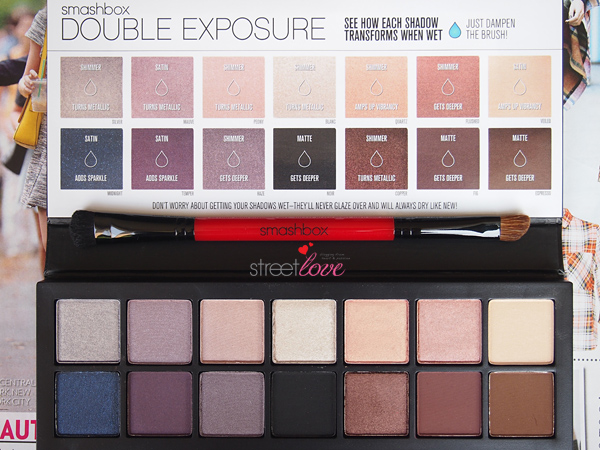
The Smashbox Double Exposure Palette is a 14 shadows versatile palette that transforms into 28 as this palette are specially designed to be used dry or wet. This latest innovation is all about mixing it up.
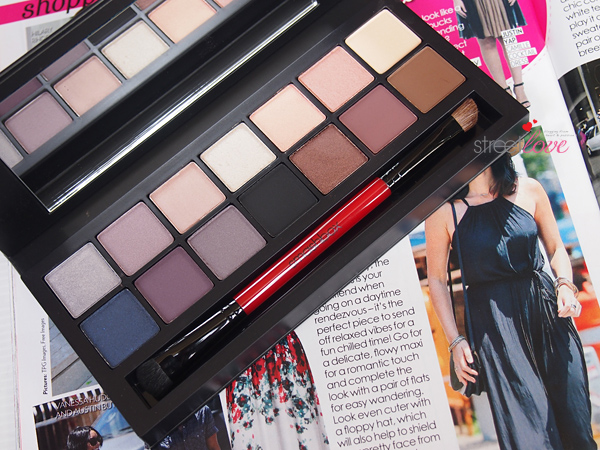
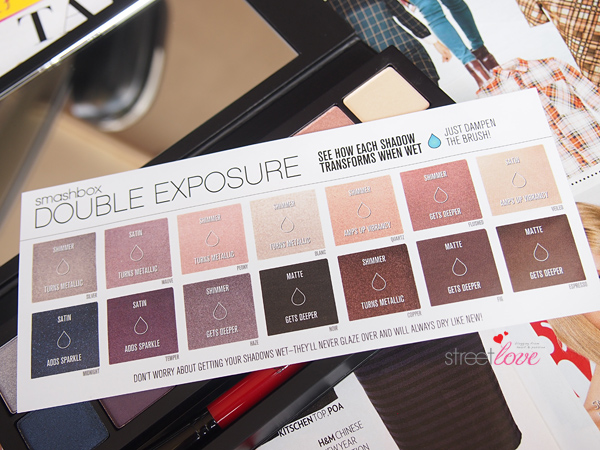
Within the 14 shadows, there are 7 shimmer shades, 4 satin shades and 3 matte shades. Each shadow changes in one of four ways when used with a wet brush thanks to coated pigments that create multiple effects. Add water to either amps up shade vibrancy, to turn shade deeper, to turns shade into metallic or to add extra sparkle to the lid.
It can be a little overwhelming as 14 shades is a lot to play around and it takes a bit of time experimenting each and every shade to find what shade turns to what and how it transform. The good news is, there is a so-called guide card indicating what shade turns to what when used with a wet brush. At the beginning I was referring to the guide but later on I find myself loving the idea of experimenting the transformation myself, mixing and matching the shades each time I’m doing my makeup. I must admit. I get carried away with the experiment that I’ve been using it every evening before jumping into the shower as I was so eager to see how each shade transform and how I can create so many different eye makeup look. It has been quite some time since I get so excited with an eyeshadow palette 😀

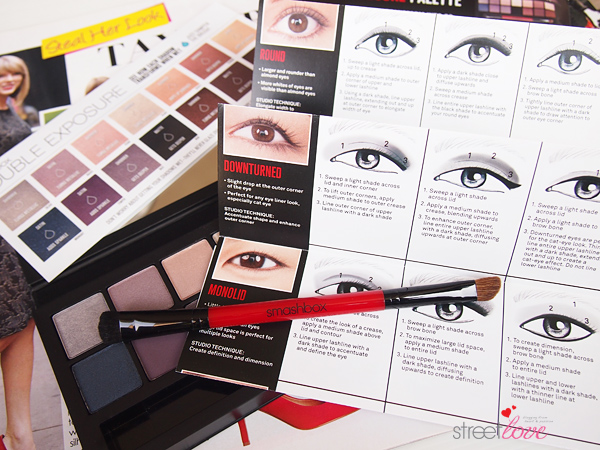
Together with the palette, you will also get a deluxe size Full Exposure Mascara and a #SHAPEMATTERS insert with how-to’s for 6 eye shapes. This insert will give you a clearer indication on how to do eye makeup according to your eye shape. As for me, I don’t really bother about eye shape. I just do whatever eye makeup I feel like 😀
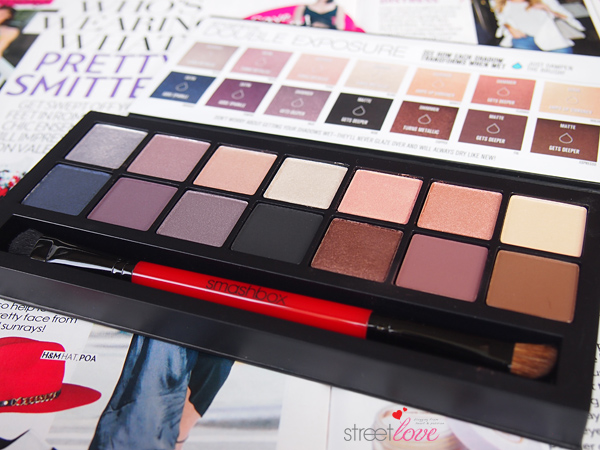
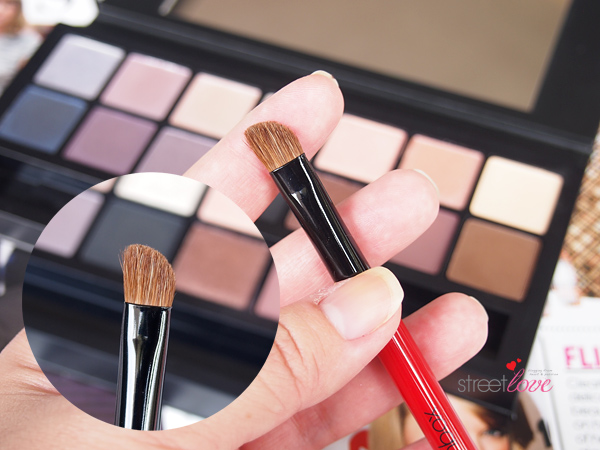
Smashbox has always known to include a top notch brush together with their eyeshadow palette. Not a cheaper version from the brush line or any cheapo brush but a darn good brush. This time it’s not exceptional either. Inside the Double Exposure Palette is a high quality double-ended brush. I usually don’t use the brush included in the palette but this time I find myself relying on the brush a lot. I wish it comes with a few! 😀 .
On one end of the brush is the Domed Side. It is a shorter bristle shader brush that are densely packed but yet soft, designed to be able to absorbs just the right amount of water for impactful color to the lid.

On another end of the brush is the Angled Side. It has longer bristles but yet dense enough for a precise line when used wet or a diffused line when used dry. I personally like to use this brush dry for the lower lash line. It still gives me a deep, pigmented precise line, which other brushes couldn’t give me. The bristles are slightly tapered on the sides, which is why I like the precise line on my lower lash line.
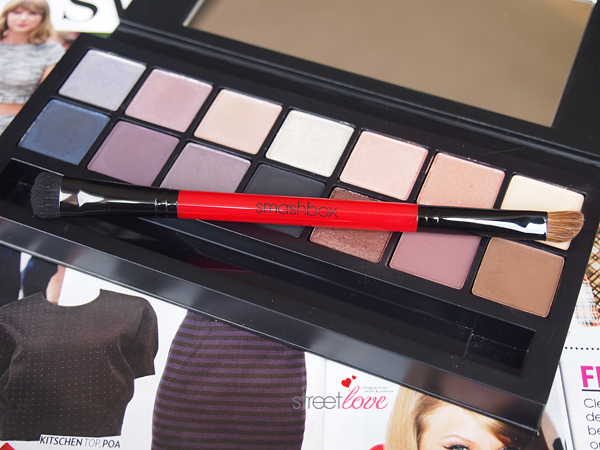
Here is an up close look at the palette and the dry and wet guide card before I start dipping my brush in it 😀
Swatches time!
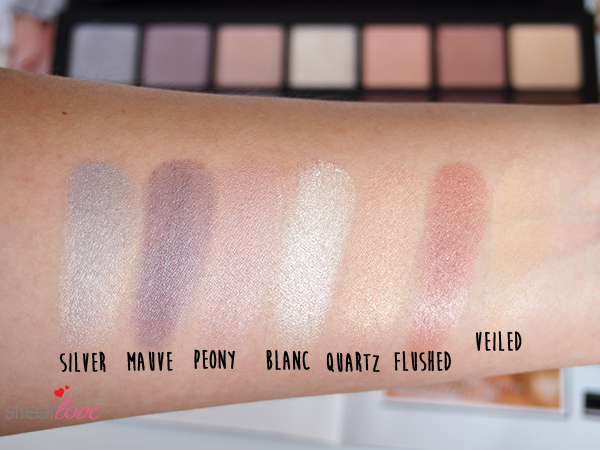
The top row of the palette consists of mainly shades that I like to call light and fleshy shades. All 7 shades are mainly shimmer shades except for Mauve and Veiled which are both satin shades. The top row is also what attracts me to the palette. It is so hard to find shades like these for the mobile lid. I probably use these type of shades more than everything else to brighten the eye and eye makeup look.
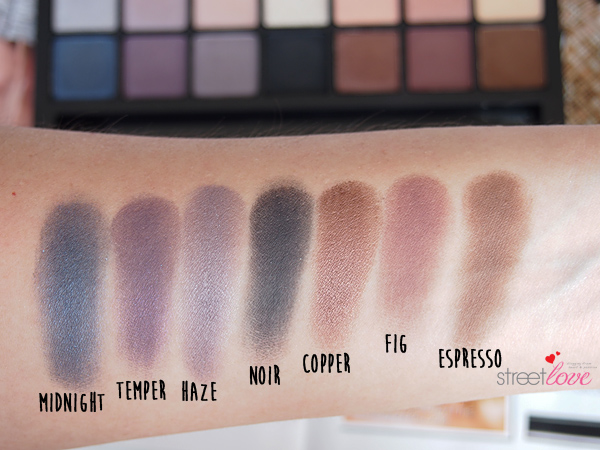
The bottom row on the other hand is more darker in shades and smokey. There are a healthy varieties of satin, shimmer and matte shades here. Haze and Copper are shimmer shades, Midnight and Temper are both satin shades while the balance Noir, Fig and Espresso are matte shades. It might freaks you out that out of 14 shades, there are only 3 matte shades.
I have actually done 2 eye makeup tutorial look using the Double Exposure Palette for this review but later on decided to do a third look, which is this Soft Cut Crease look. I think this tutorial is easier for everyone to follow although I still use a total of 7 shades in total lol 😛
Step-by-Step Soft Cut Crease Tutorial
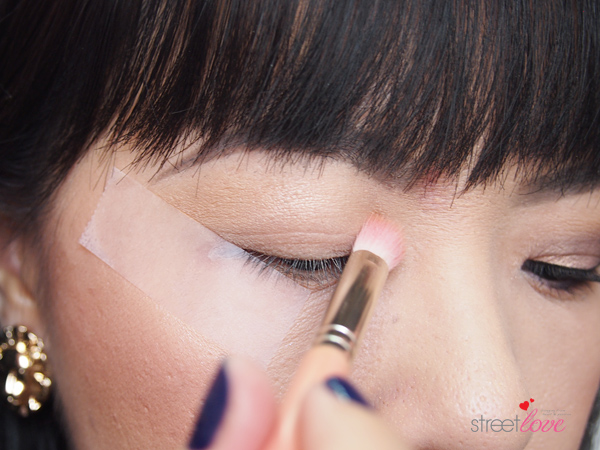
Step 1: Put a scotch tape (or any normal tape) from the outer corner of the eye to the tip of the eyebrow as a guide. You can place it straighter if you prefer a flatter look.
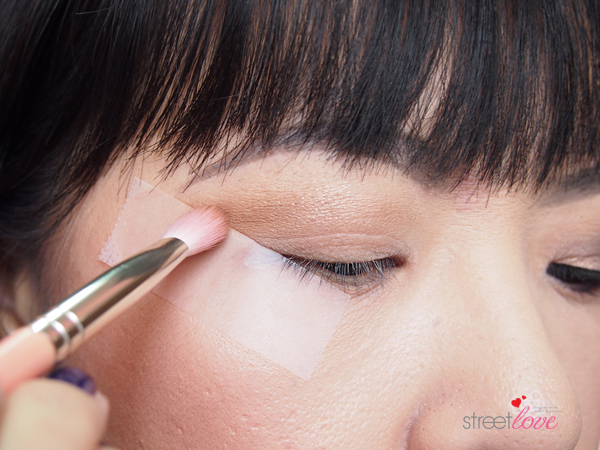
Step 2: Apply a bone shade / highlight on the under brow bone.
Step 3: Take a fluffy blending brush, apply Veiled on the upper crease line, bringing the shade all the way to the inner corner of the eye.
Step 4: As there is no transition shade in the palette, lightly dip a blending brush into Espresso and apply slightly lower than the crease line where Veiled was applied on earlier. Use a clean blending brush to blend both shades together if Espresso is too harsh. I prefer to use a stiffer brush (Bdellium 776) for this step as I like a deeper and sharper brown shade for the gradient effect.
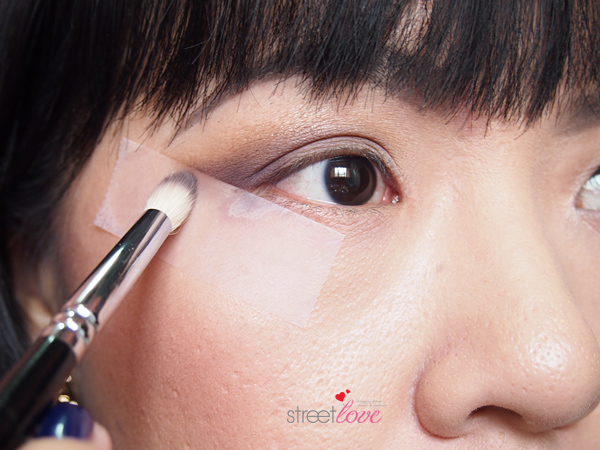
Step 5: Take a pointy crease brush (Zoeva 231 Petite Crease), dip into Temper and with eyes looking straight into the mirror, apply on top of the lid, bringing the shade all the way to the inner corner to create a dimension.
And using the same Temper and the same brush, apply the shadow below Espresso in a tringle shape on the outer corner, winging the shade out.
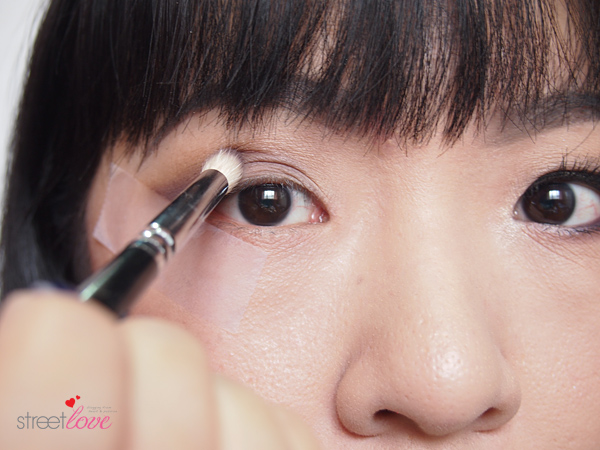
Step 6: Take the Smashbox double-ended brush, mist some Smashbox Photo Finish Primer Water (or just water) onto the Domed Side brush, wipe the excess water on a piece of tissue paper, dip into Quartz and apply onto the area on the lid where there is no eyeshadow aka the mobile lid. This will instantly brighten the eye and bring the whole look livelier.
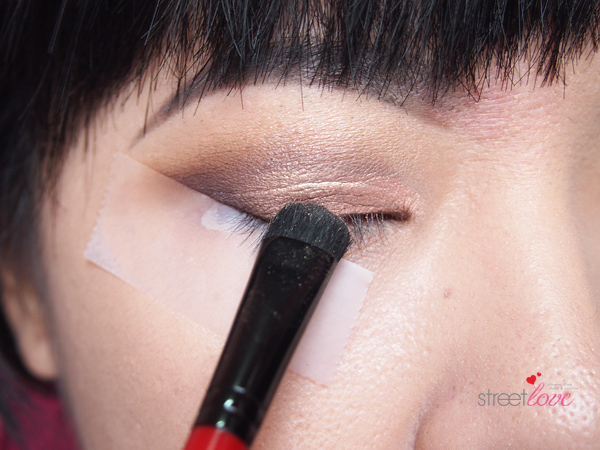
Step 7: Remove the scotch tape. You will find a crisp sharp line on the outer corner. I usually like to use a finger to gently tap on the line to soften the line a bit.
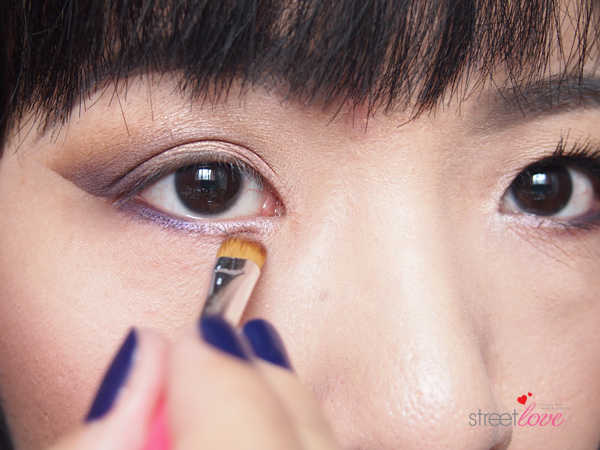
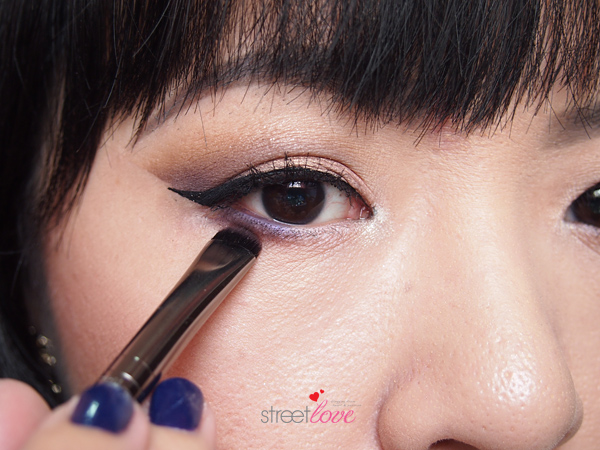
Step 8: Take the Double-Ended Brush, using the Angled Side, dip into Temper again and run it along the 3/4 of the outer lower lash line.
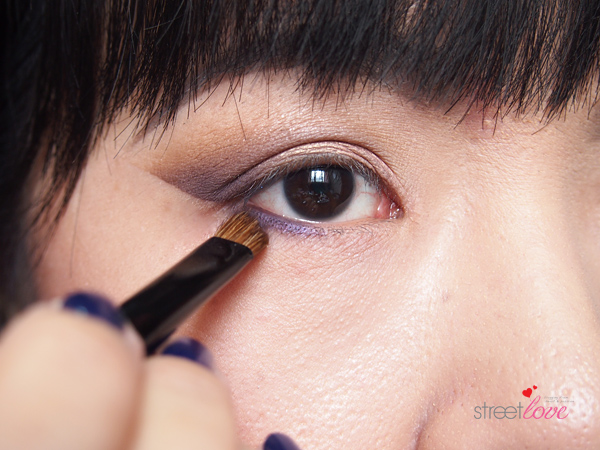
Step 9: Use a smaller shader brush or the same Angled Side brush, dip into Peony and apply onto the remaining 1/4 of the lower lash line. You can do this wet but I chose not to as I want a softer highlight on the 1/4 inner corner.
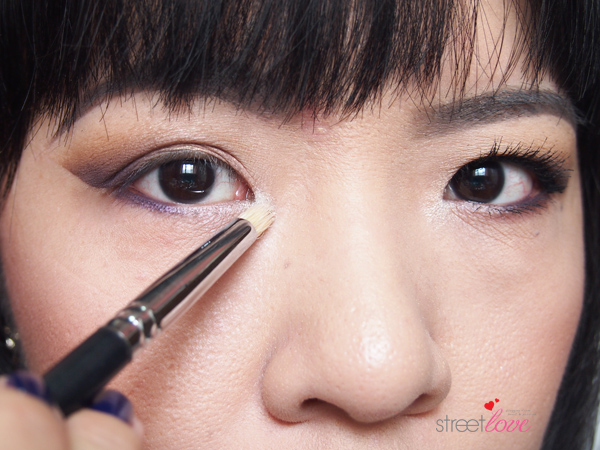
Step 10: Take a small pointy brush, mist some Primer Water, dip into Blanc and apply onto the tear duct area. This will complete the whole look with the instant bright lift!
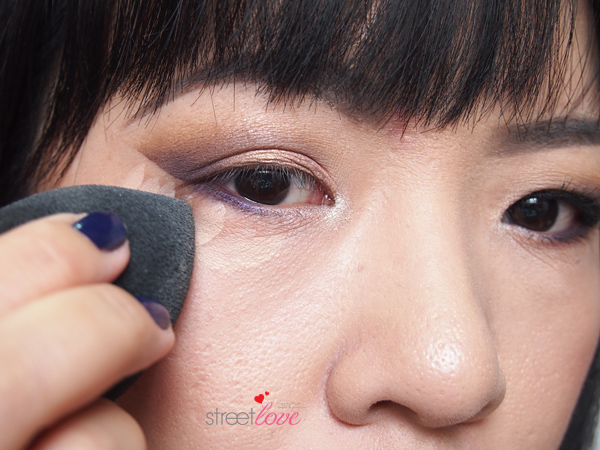
This is optional but I like to clean up the under eye using a little bit of concealer and blend away using a Beauty Blender.
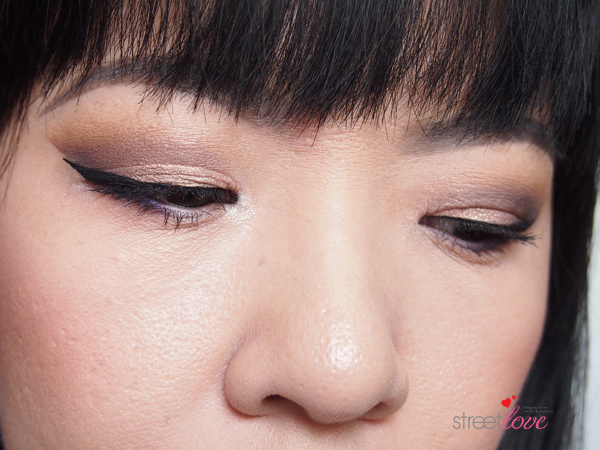
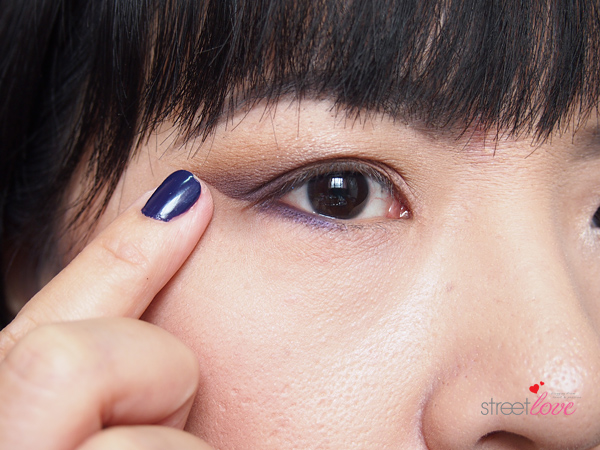
Apply eyeliner and mascara as normal. I decided to go back with a short bristle shader brush and dip into Fig to smudge out the bottom of Temper shade slightly on the lower lash line. The warm brown will give a little bit of warmth to the look and it will look more complete 🙂
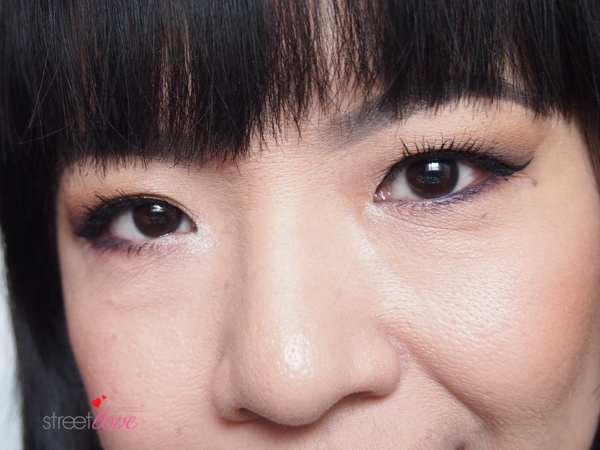
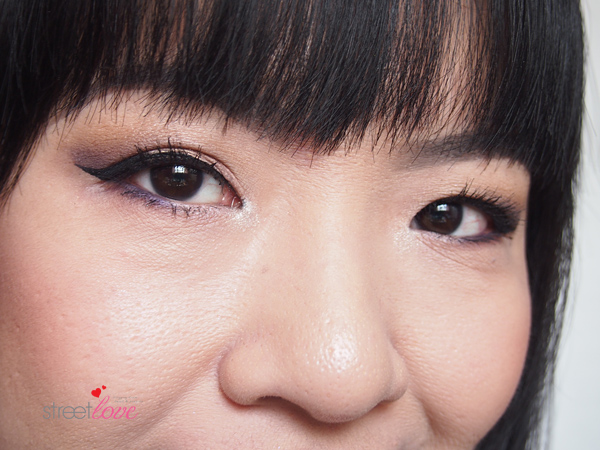
This is the finished look 😀 . I hope you like my version of Soft Cut Crease tutorial. I don’t usually use scotch tape and if I need to use a tape for the outer corner, I would use a small loytape. I find that loytape doesn’t give a crisp sharp line like how scotch tape gave me and I prefer that. I’ve decided to go with scotch tape just because everyone is using it. In my opinion, use whatever tape you like 😛 . Or you can skip the tape and use a wet tissue to clean up in order to get that crisp line. The line has it’s pros too. Applying eyeliner thereafter is so much easier. All I do is to follow the line.
This look can easily be recreated using the brown and the blue from the same Double Exposure Palette. All you need to do is to switch the shades up a little bit and the effect will be somewhat different and unique in it’s own way despite applying with the same steps.
Most eyeshadow palette claimed that their shadow can be used with a wet brush and in the end the wetness from the brush created a hard layer on top of the eyeshadow pan and the eyeshadow could not be used anymore. I notice that it doesn’t happen with the Double Exposure Palette. No matter how many times I wet my brush and keep dipping the brush onto the pan, it doesn’t create a hard layer on top of the pan and the eyeshadow still performs as good as it was before. That is what I really like about the palette beside the versatility.
On another note, as you know I have very sensitive and watery eyes. Although I notice some shadow fallout on the palette, it doesn’t give me any fallout during application and the powder does not sting my eyes or make my eyes watery. That is really a plus point for those who had the same sensitive eyes as mine. Some of the shades may be a bit too sheer when used dry but once added with a little bit of water, it become intense so this solved the issues where some people may think the payoff is sheer. All you need to do is to wet the brush 🙂 . I also notice that there is no colour transfer for hooded eyes and no creasing especially on the mobile lid where I usually put the shade down using a wet brush.
Smashbox Double Exposure Palette is now available at Smashbox counter at Parkson Pavilion and at all Sephora stores nationwide (except for Robinsons).
Price: RM180
For more information, please visit Smashbox Product Website.
Disclaimer: Product was sent to me for review consideration. This doesn’t affect my judgement in the review in any way.

Comments (4)
Oooo, I love this eye makeup that you created and thank you for the detailed step by step. I have Smashbox Full Exposure and am seriously in love with it however I skipped this because I’m a neutral girl, anything colourful will make me run screaming the other way. LOL!
Thanks Shireen 🙂
I love Full Exposure Palette too. I’m more into that than the Naked palette, and it’s cheaper too haha. I’m a neutral once in a while. But most of the time I like a pop of colour. Usually a purple or blue from a palette like Double Exposure always ended up smokey on my eyes 😀
Love your makeup tutorial as usual. You have a set of sultry, seducing eyes :D. This palette seems to be a good investment with it being a tad cheaper than Urban Decay.
Thank you dear 🙂 . Lol. I have a set of typical Asian eyes. Small 😛 . The palette transform to 28 shades considering the fact that it can be used in wet condition. Slightly cheaper than Urban Decay and versatile if you are not into fully neutral palette like the Naked palette 🙂