
Being as random as I already am, I’m going to do something different today 😀 . Rather than the usual conventional review that you’ve been reading online all these while, what you’re about to read is called “Get Ready With Me”, which is a full view on how I usually do my makeup on daily basis. Usually Get Ready With Me is mostly videos but you know me. I’m not a vlogger so this will be the first ever Get Ready With Me blog post *yay* using the latest Mary Kay At Play™ cosmetic products.
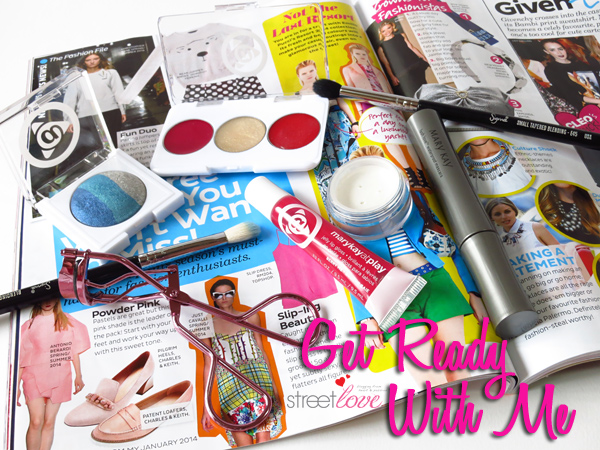
I was sent quite a number of the latest Mary Kay At Play™ products, but today I’m just going to use a few of it to create an everyday look. To me makeup is all about enhancing one’s beauty, not changing one’s look to another. Therefore minimal makeup products can transform your look too.
I usually start my day with a complete day time skin care routine, which I’m not going to show here because it’s really a lot. Perhaps I’ll do a separate Get Ready With Me post next round 🙂 . Eventhough I have oily skin, I still do put on heaps of skin care as my skin can be very dry after cleansing and foundation doesn’t goes on my face smooth. The key is to put on moisturizer before any makeup product on. Then I will put on my Crest 3D White Whitestrips Professional Effects on my front upper and lower teeth for 30 minutes while doing my makeup. I will review this soon 🙂
Foundation
I don’t have any Mary Kay liquid foundation with me so I’m using what I have at home. I choose what foundation to wear for that day based on the coverage I want, what my schedule for the day and what type of finishing (dewy or matte) I want. What you see here is Kanebo Lunasol Modeling Water Liquid Foundation #OC02. I’m currently into Sigma F80 Flat Kabuki Brush. I’ve heard how foundation application is faster and how flawless the finishing is using Sigma F80 so I picked up one myself and I never look back since then. It’s as good as the rave I heard.
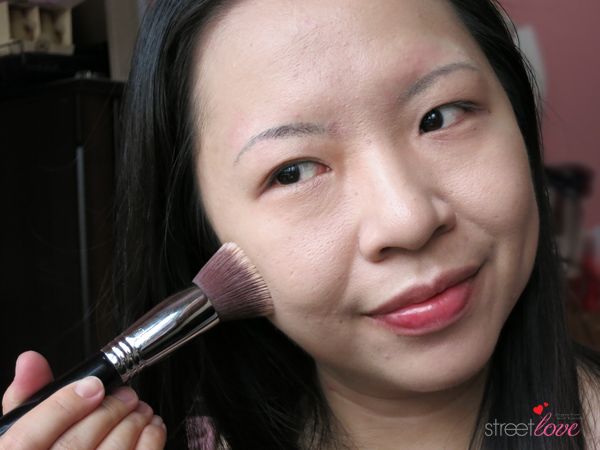
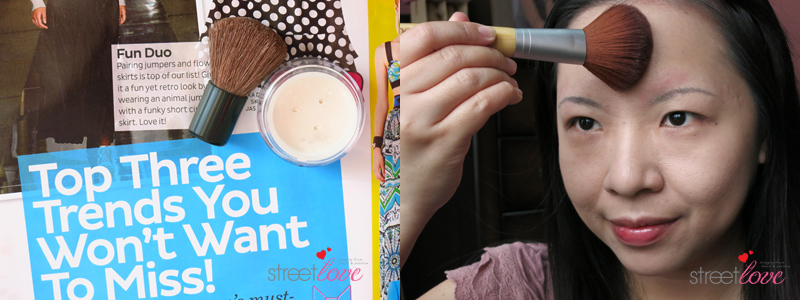
Finishing Powder – Mary Kay Translucent Loose Powder
As we live in a hot, humid country and the fact that I have oily skin, there’s no running away for me when it comes to mattifying and setting the foundation with a finishing powder all over my face. I used Mary Kay Translucent Loose Powder mini sample that was given to me. The texture is how I like my finishing powder to be. It’s fine and dry-like so it stick on well to my foundation giving me that smooth surface when touch. Some powder tend to be fine and slightly wet when touch.
Normal and combination skin girls can opted to only powder your T-zone. I prefer to powder the whole face 😀
Concealer and Eye Brow
For this step, I used my own Estee Lauder Idea Light Brush-On Illuminator #02 Light Medium Concealer for some coverage on my acne marks and Daiso eyebrow pencil for the brow. I’m not going to talk about how to put on concealer because (1) I don’t conceal anything else than acne marks and (2) I believe you should already know how to conceal by now 😀 . As for the brows, I’ve done a tutorial on how to draw your eye brow before (read this) so I’m not going to talk about that either. Just remember your brows are sisters not twins. They are not suppose to look identical 🙂
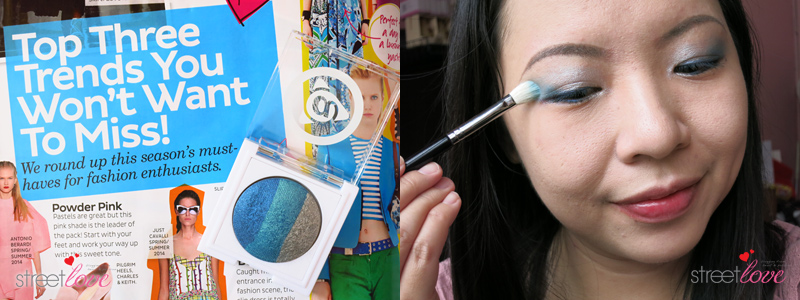
Eye Shadow – Mary Kay At Play™ Baked Eye Trio #Ocean View (RM40 / 2g)
Some people do their eye makeup first before face especially working with eye shadow that are tend to have fallout but I like to be otherwise. I’m also a person who prefer some color on my eyes and blue is one of it. Mary Kay At Play™ Baked Eye Trio is entirely new and it comes with three different vibrant eye palette. Each palette contain three shades that work hand in hand with each other.
Mary Kay At Play™ Baked Eye Trio #Ocean View is a beautiful vibrant blue shades. I bet you knew that from the name 😀 . The shadow is smooth and very pigmented so I run the brush over the back of my hand first before applying onto the lid. The color is buildable so take time with application.
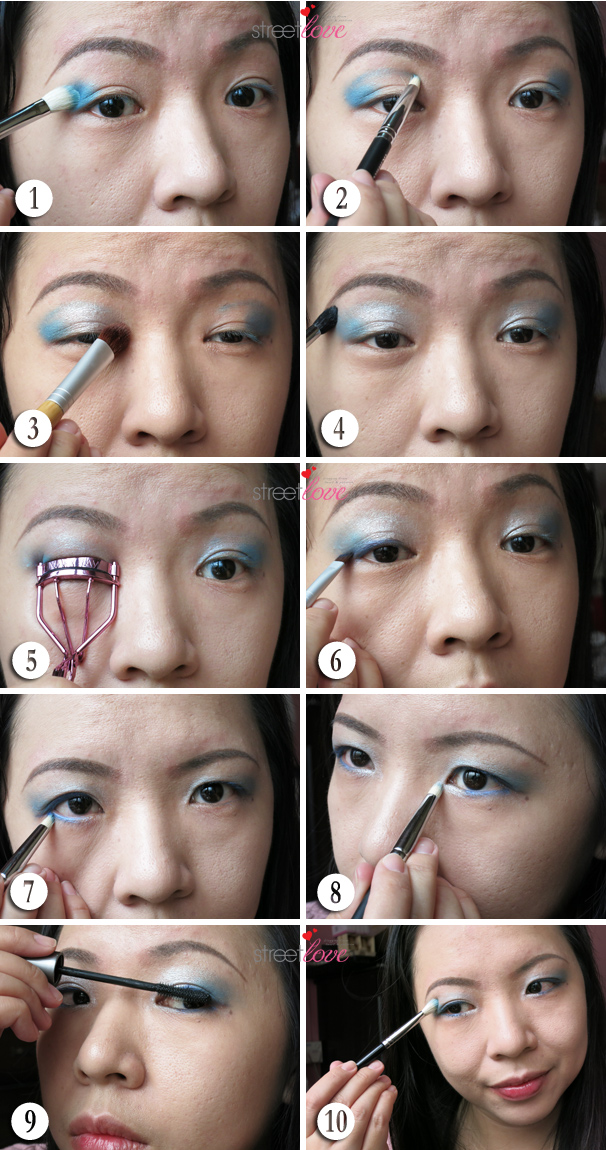
Here’s how I apply my eyeshadow. I usually do three to four shades on my lid but because this palette only contain three shades, I used two on my lid and the darkest as eyeliner. I would expect fallout from this palette but to my surprise there is hardly any on my face, only on the pan 😀
Sometimes I tend to over-blend the shade, which explains the missing crease line from Step 2 in the end. What I usually do is to touch-up after everything is done, which you can see in Step 10. To prevent all this over-blending mistake or over-applying on one eye, always do your make up in front of a huge mirror and in front of sufficient light 😀
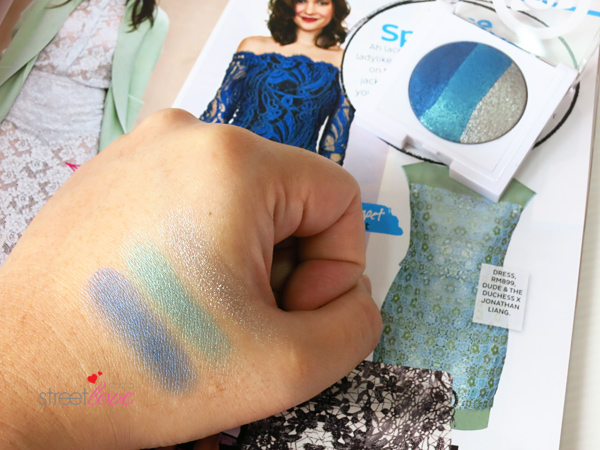
Many people are afraid of applying blue eye shadow. I never find blue intimidating. Just look at the color swatch! Isn’t it beautiful? 😉 . I find that the shade will be more even out as the day goes. At first it may looked a bit weird and “bluey”. Give it some time and everything will blend out itself.
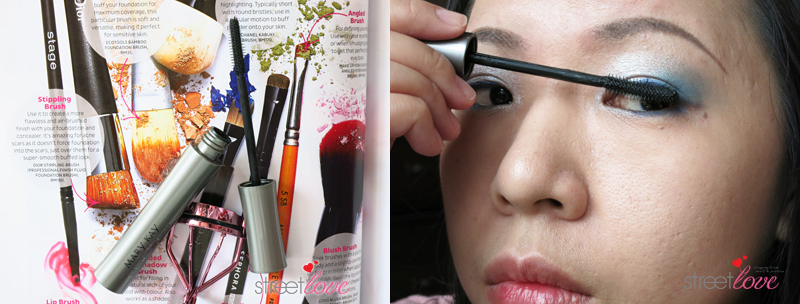
Mascara – Mary Kay Lash Love™ Waterproof Mascara #I ♥ Black (RM75 / 8g)
Some people are born with naturally curled eyelash but sadly mine is straight down. There’s no escaping in curling eyelashes with an eyelash curler. I was also sent a gorgeous Mary Kay Pink Eyelash Curler. Not going to talk more about that because mascara to me is like something that I must put on no matter what.
I have this mascara from early 2013 but never get around to use it until today. This is a waterproof mascara which means it won’t smudge if I walk in the rain or if I cry lol but I also find this oil-proof too as it doesn’t smudge on my oily eye area. The brush is petite, just the way I like my mascara brush to be. Each lashes are well separated and they don’t clump together, all thanks to the sculpted brush design. I also can’t smell the usual mascara scent, which I later on found out that it’s fragrance free. Not bad eh?
The formula is also not too wet, making application much more easier. I personally would prefer this type of formula and texture as it’s easier to apply for second or third coat.
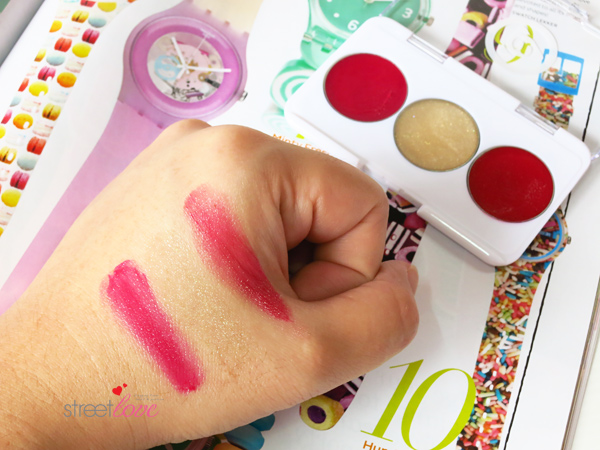
Blush – Limited Edition Mary Kay At Play™ Just for Lips Lip Gloss (RM55 / 2g)
Using lipstick as blush is not something new. I have done it before a few times actually and it’s the same as working with cream blush. I’m a bit hesitant to use this Mary Kay At Play™ Just for Lips Lip Gloss as blush because it’s lip gloss. I tried it beforehand and it worked so well probably because this is as solid as lipstick. The color is very pigmented and it doesn’t cake my base makeup. Just a few dab and I have a flush of pink on my cheeks. The only drawback is the strong berry scent.
Mary Kay At Play™ Just for Lips Lip Gloss is a limited edition product. It’s a trio palette of super glossy lip colors that can be worn alone or mixed and matched to create fun, new looks.

This lip gloss palette comes with three lip color – dark pink, clear shimmer and red. The clear shimmer shade on the center can be used on top of other shade for extra holiday glamour. Of course you can opted to use it on it’s own. On the palette, both dark pink (left) and red (right) looked very similar. You can only tell the shades apart from swatching the shade on the back of your hand. I used the red from the right as blush 😉
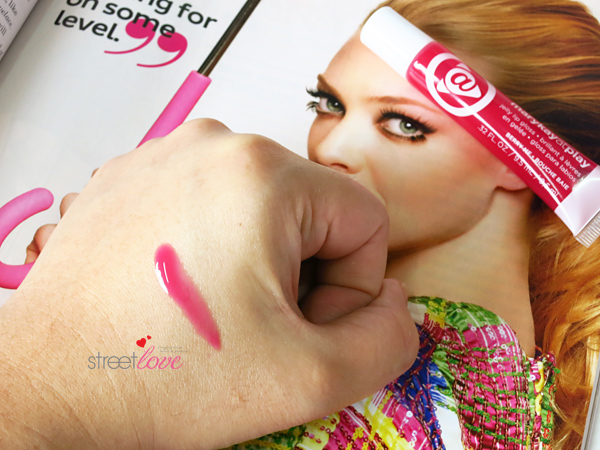
Mary Kay At Play™ Jelly Lip Gloss #Berry Me (RM30 / 9.5ml)
Honestly I’m not a lip gloss person because I don’t like the stickyness on the lips. Mary Kay latest lip gloss for At Play™ is called Jelly Lip Gloss and the jelly word is already changing a bit of my perception towards lip gloss as some tend to be non-sticky. I was hoping this were too!
Mary Kay At Play™ Jelly Lip Gloss is featuring fun and flirty gorgeous pinks and reds. This high-impact glosses are more ultra shiny and smooth on the lips. It gives the lips the necessary shine but not as if you had chow down a brick of butter 😀 . The color on the tube may looked a bit intense but really, it gives a sheer hint of color. I find it to be like a watery lip balm. Not oily, not sticky when I press my lips together. I had Berry Me on, which is a blood red on the tube but turns out to be slightly pink on the lips. On me it’s more like my lips color.
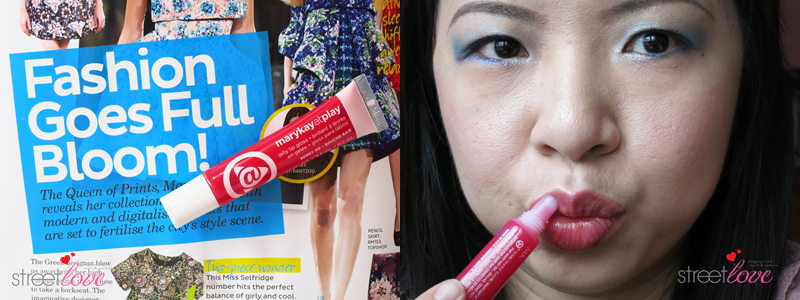
What I find weird is that the gloss is not sticky on my lips but removing it feels a bit tacky thereafter. To remove completely from my lips I would need to use a proper lip makeup remover. A tissue just doesn’t work. The name Berry Me really suits the color payoff well. It’s more of a berry color on the back of my hand. So far it doesn’t dry my lips like some lip gloss do. It doesn’t have a strong fruity scent like Just for Lips Lip Gloss palette, which I appreciate very much. Yay for that!
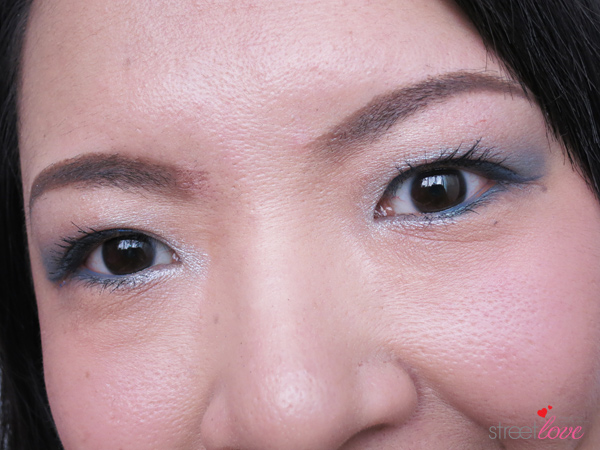
Now that you’ve seen how I do my makeup, here’s a close-up look on the eye-do. There is many many ways on how to apply eye shadow and it took me quite some time to find a method that I like. I don’t do one-shadow look. I must have at least two color minimum on my eyes 😀
You can intensify the eye liner with a wet brush. What you can do is to wet a cotton pad slightly and run your angled eyeliner brush on the cotton pad before dipping the brush on the eye shadow. This will create a more intense line and not to mention more long lasting too.
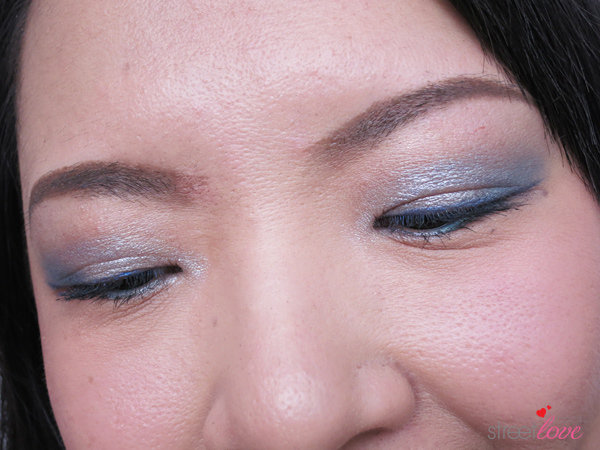
I usually apply eye shadow right until the eye socket line so that the color is visible even when I have my eyes open. You wouldn’t want to apply eyeshadow where no one can see it right? 😉

Mary Kay products is available for purchase through Mary Kay Independent Beauty Consultant.
Locate a Beauty Consultant – http://www.marykay.com.my/beautyConsultantLocator.aspx
Price:
+ Mary Kay At Play™ Baked Eye Trio – RM40 / 2g (On The Horizon, Ocean View, Tuxedo)
+ Mary Kay Lash Love™ Waterproof Mascara – RM75 / 8g
+ Limited Edition Mary Kay At Play™ Just for Lips Lip Gloss Palette – RM55 / 2g
+ Mary Kay At Play™ Jelly Lip Gloss – RM30 / 9.5ml (Berry Me, Teddy Bare, Hot Tamale)
For more info on At Play™ products, please visit http://marykay.com.my/at-play-buyopp.aspx or Mary Kay Malaysia Facebook page at https://www.facebook.com/MaryKay.com.my
Disclaimer: Product was sent to me for review consideration. This doesn’t affect my judgement in the review in any way.

Comments (18)
I love the last picture. You look great!! I say the blue shadow does not look intimidating. Pretty.
Thanks! 😀 . Just be light handed and you’ll be fine. I’m all about blue, purple and green.
LOVE THIS POST^^ Something different 🙂
Well done^^
I like to watch Get Ready With Me videos. Those are funny. The music and the fast forwarding speed is quite a laugh.
Yessss! Something different is what I am lol. Random right? Ahhh yeah. Those videos are fun to watch but the fast forwarding part is cute. Accompany that with background music and it’s quite hilarious sometimes.
Looking gorgeous! Get Ready With Me is always fun and blue? One of the best shade to play with!
Thanks. It was one messing Saturday morning 🙂 . It’s fun to do Get Ready With Me. I thought I wanna start with blue first as the other colors I have is more darker. Agree. It’s still one of the best shade to play with. I’m generally into colorful stuff.
I like how you applied the eyeshadow, it looks gorgeous! I have blue eyeshadows but i haven’t tried them yet coz I’m afraid it will look weird on me *guilty as what you wrote above*. Oh please do other looks with the plum and smokey palette! I really love plum colored eye shadow, who knows your next tutorial might teach me something new ^_^
I do admit it looks weird at first, just like the last picture of mine LOL but as the day goes, everything sort of blended together after face oil up a bit 🙂
Just experimented with plum shade today. I love the color more than blue (OMG). Will do another version in the next two weeks 😉
i love the fact that u did this in blog post form! so fun to look at!!! and yes pleaseeeeee do get ready with me in other eyeshadow colours! and skincare get ready with me too!!!
You like it? Okay. Must do more 🙂 . Get Ready With Me skin care and other eyeshadow color is in the pipeline. Soon soon.
yay!!! *muaks~*
and i forgot to say, u have became more and more pretty and confident looking!!! can see those through the photos nowadays
Really? I sucks at posing for photos. I hate my dimple. It created a piece of extra fat pocket on my cheek yikes!!
where got!!!!!
i love your dimple!!! i want dimples!!! they are so cute! give u that extra young and energetic vibe!!
tsk tsk tsk~
haha, i suck more in posing… i can only stand straight and smile the standard smile.
Got. I did some magic in the picture LOL. I have just one dimple. So annoying. Because when I smile my face is all tighten up so the dimple hole is making my face wider. So frustrating! But I see the “face tighten up” as a good thing hahahahaha
Me too. Always stand straight and smile. That’s all. I should practise the Amber Chia pose with a leg extended out one. So cool.
So Vogue! Love this post and the photos. I like photos 9 and 10! Love the killer look when you apply the mascara and when you apply the finishing touch to your make up. I like the lovely finishing that the blush provided. So subtle and yet noticeable 🙂
Killer look lol. I have no idea what the camera capture because I put it on top of something with the preview side facing the back. What used to take less than 15 minutes took one hour that day. So stressful. I wonder why they don’t release blushes in the collection. Hmmm
What a beautiful skin you have, Fiona. Amazingly flawless! You’ve done a very good job on this tutorial. Very detailed and the photos are all nice. You look great. Thanks so much!
Hi Susan, thanks! I give the good skin credit to Estée Lauder’s new Micro Essence 😀 . Glad you like the tutorial. Not easy to photograph while doing the makeup at the same time haha.